MAKE it yourself Oreos

Lots of people do DIY's, which is basically doing something you don't have to do, yourself. Well, there is also this thing where people by pre-made foods, when they can make it themselves. So, that's what this is.
Or was.
Until, I made a substitution that I didn't know enough about!
I basically found a recipe that had cocoa powder, only to realize when it was to late that we didn't have any. My solution was to use baking chocolate, which is pretty much a chocolate bar without sugar. Here came My Big Mistake. Forgetting that baking cocoa really contributes to the texture of the dough, I didn't alter the recipe in any way. What I should of done, was add maybe 1/2 to 1/4 a cup more of flour because the ratio of wet/melted to dry would be uneven in the oven therefore resulting in flattened cookies. This also is the reason why you add more butter and less flour to get crunchier, thinner chocolate chip cookies.
If there is only one thing you pay attention to in this entire MIY, it's what I just did. Always take note of what your wet:dry ratio in your cookies. And please remember that yours will turn out better than mine did, and that you shouldn't judge a recipe by the photo.
On with the recipe!
Cookies
1 1/2 c White flour
1 1/2 c Whole wheat flour
2/3 c Cocoa powder
1 c Sugar
1/4 t Salt
1/4 t Baking soda
1 1/2 Sticks of butter
2 T Milk
1 t Vanilla extract
Filling
1 stick of butter
2 t Vanilla extract (or other to be fun!)
Large pinch of salt
2 c Powdered sugar
- Mix the dry ingredients in a mixer with the paddle attachment. Keep it running as you drop butter 1 tablespoon at a time until it becomes crumbly. Add the milk and vanilla and stir until the dough sticks together.
- Heat the oven to 350 F and grease 3 pans.
- Roll the dough out to 1/4 of an inch and cut using 1-2 inch circle cookie cutters. Bake 10-12 minutes.
- Beat the first 3 ingredients of the filling together, and then slowly add powdered sugar.
- Once the cookies are cooled, top one with frosting and twist another on top. Make sure to let sit a few minutes before devouring.
Now for the more detailed enlightenment:
The first step is pretty much the same, dumping all the dry ingredients together and mixing. As usual, I'm using my signature metal Kitchen Aid bowl.


A I already told you, I used baking chocolate instead of cocoa powder. I though it would be easy to just blend it into little bits that would resemble the powder form, and then just add it in with the dry ingredients. However, I think it would have been way better to melt it and add it with the wet ingredients. That way, I would have caught how moist the dough would before it went into the oven. Of course, the blender didn't do the best of jobs either, because it really can't turn something semi-dry (chocolate has oil in it) into powder! It ended up looking like tiny pebbles or large sand granules.

Cut the butter in two tablespoon-sized pats before you add it in. My butter has conveniently placed lines measuring each tablespoon.

Next you must run the mixer continually as you add each section separately. Stop it once the dough looks pebbly, or again, like sand. My really did, because of the chocolate chunks. So much so, that I had to taste it to make sure I wasn't mistaken!


The last two ingredients are drizzled in accordingly, and help the dough stick together. It'll be all ready once it looks like this:

Pat your dough out on a thoroughly floured surface, into a little rectangle.
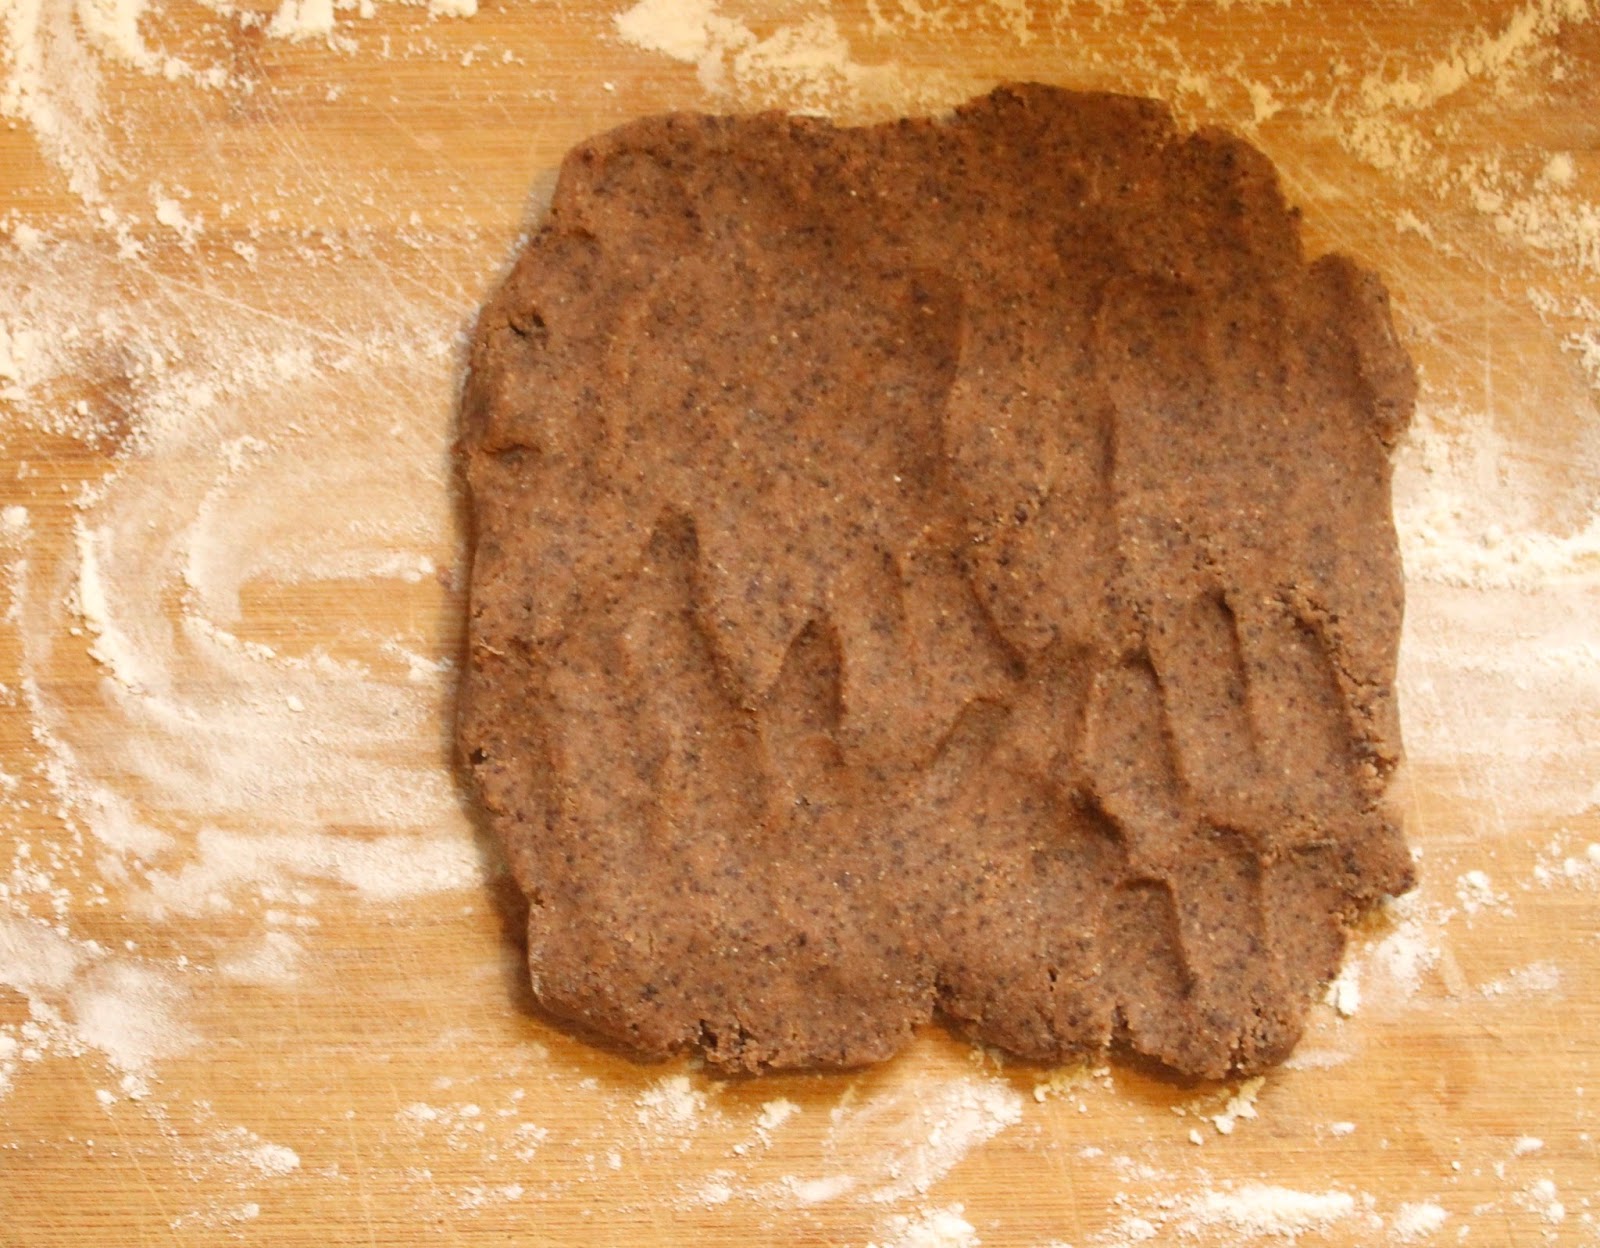
Make sure to have all your supplies on hand, or you'll be poofing flour on the outside of every cabinet, floor and counter. A little cup of flour will come in handy when you have to re-stock your supply to keep the dough from sticking. You can also rub it onto your roller, hands and cookie cutter. Everything goes much smoother that way.

Roll it out to a little less than one-forth of and inch, or a little thicker if you want thicker cookies. Make sure to start cutting as close to the edge as possible, and leave as little space in between circles. I used a mini biscuit cutter, which we love to make baby biscuits with...

Leave at least half an inch to an inch in between them on the pan because they will expand.

Pop these in the oven at 350 degrees, and let them bake for 10-12 minutes. Once they come out, don't touch them! Let them sit on the pan for at least 5 minutes, and then transfer to a rack so they can harden.

Now time for the filling:
Beat the butter, vanilla, and salt until thoroughly creamed, then add the sugar slowly to prevent great gusts of choking sugar powder from penetrating the air. You can even add food coloring; I did pink for Valentine's day.


Top a cookie with a teaspoon of filling, and twist a 2nd one on to make your finished. I had the help of my gracious grandma, who popped in when just when I was running out of time. Thanks Noni!

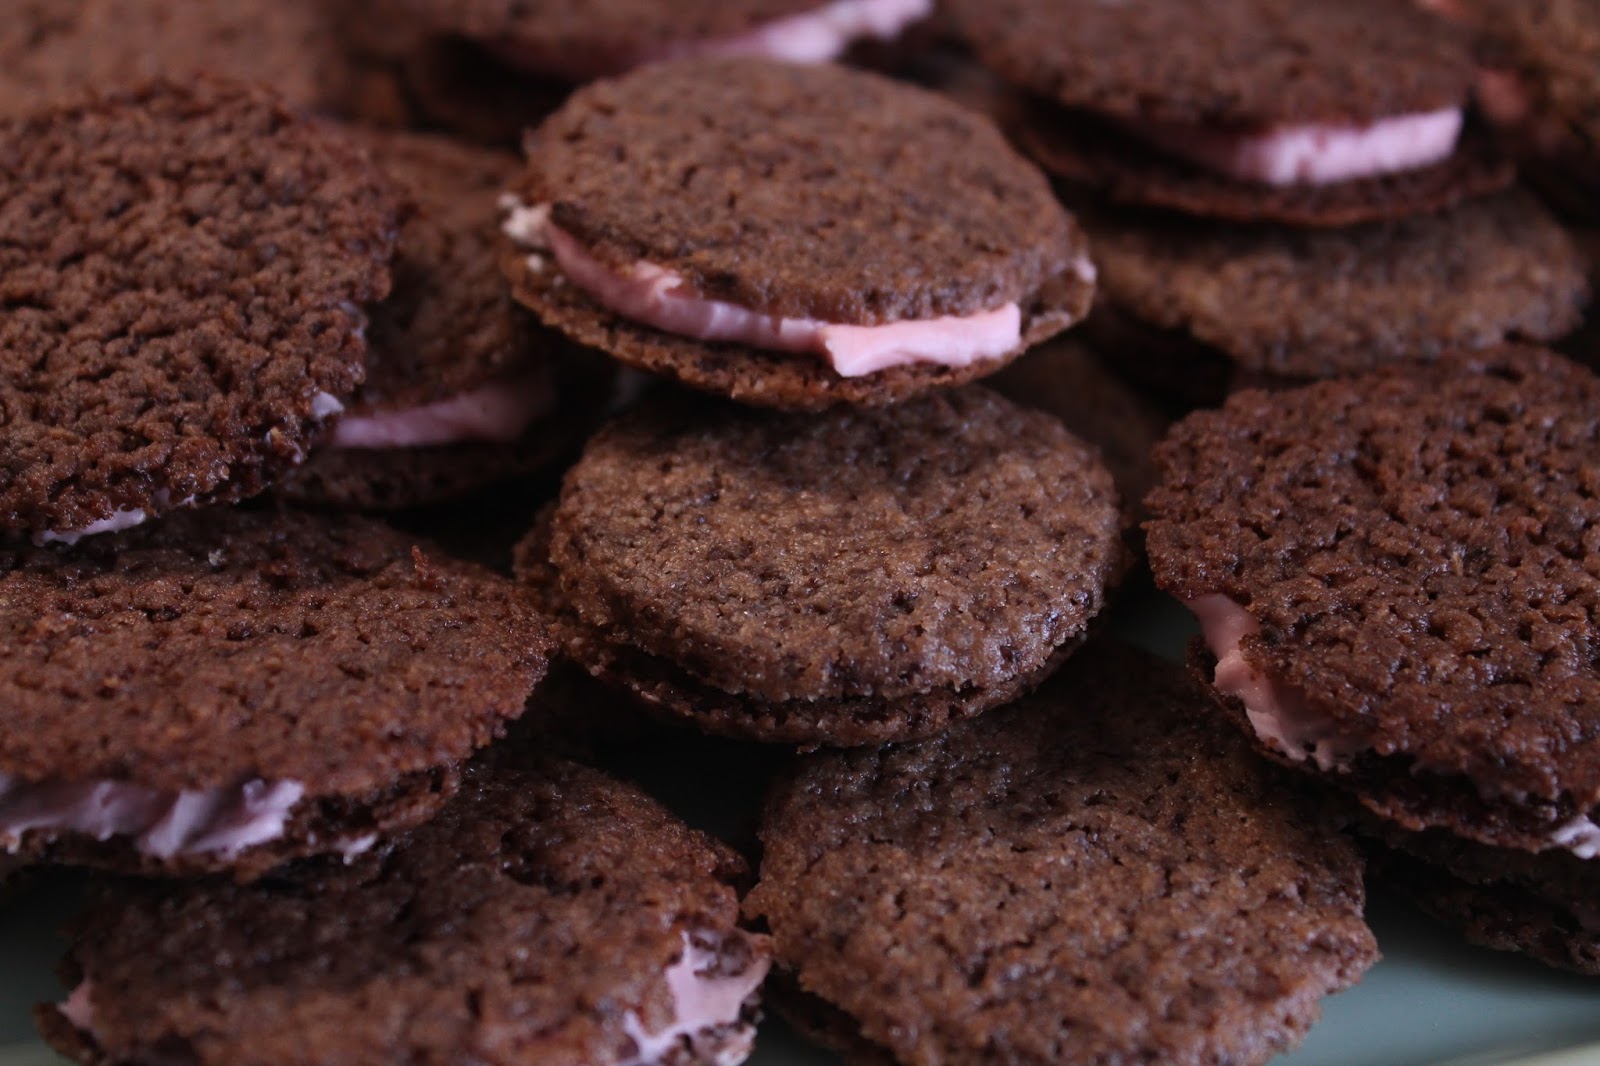
Make sure to let these puppies set for a few minutes before wolfing the whole batch down (I know, it's really, really tempting!). I also hope if you try them, they come out better then mine!
Happy MIY-ing!


Comments
Post a Comment